Grablo Help Grablo Help
  • User Manual
  • Tips
  • News
  • Go to
    • Grablo Home
    • Grablo App
  • 한국어
Grablo Help Grablo Help
문의하기
Grablo Help Grablo Help
  • User Manual
  • Tips
  • News
  • Go to
    • Grablo Home
    • Grablo App
  • 한국어
loading
  1. Home
  2. Tips
  3. Basics
  4. Pull-up/down Resistors
Updated on August 11, 2025

Tips

  • Folder icon closed Folder open iconBasics
    • Bits and Bytes
    • Digital Input/Output
    • Digital/Analog Signals
    • Calculating LED Resistor Values
    • Pull-up/down Resistors
    • 3.3V ↔ 5V Conversion
    • Serial Communication (UART)
    • DC Motor, Servo Motor, Stepper Motor
    • Multi Thread
    • Relay
  • Folder icon closed Folder open iconHardware
    • Raspberry Pi
      • GPIO
      • Installing Operating System
      • How to Change 1-Wire Pin
      • How to Find I2C Device Addresses
      • Raspberry Pi vs Arduino
      • Serial (UART) Port
      • Using Desktop Environment with VNC
    • Beagle Bone
      • GPIO
      • Installing Operating System
    • Jetson Nano
      • GPIO
      • Installing Operating System
    • GPIO Expander
      • FT232H/FT2232H/FT4232H
      • MCP2221A
      • NUMATO USB-GPIO
  • Folder icon closed Folder open iconLinux
    • Linux Directory Structure
    • Configuring Linux Auto Login
    • Installing Linux on Windows (Virtual Machine)
    • Installing Linux on macOS (Virtual Machine)
    • Installing SSH Server
    • Finding Your Controller’s IP Address
    • Connecting via SSH
    • Transferring Files Between PC and Controller
    • Fixing “User is not in the sudoers file” Error
  • Folder icon closed Folder open iconAudio/Video
    • Fixing Audio Stuttering and Latency Issues
    • Playing Audio Through Bluetooth Speakers
    • Selecting Instruments from SoundFont Files
    • Fixing “Failed to create new vlc instance” Error
  • Folder icon closed Folder open iconDatabase
    • Setting Up Firebase Database
  • Folder icon closed Folder open iconIoT
    • Setting Up Google Cloud TTS/STT
    • Setting Up OpenAI TTS/STT
    • Setting Up ElevenLabs TTS
    • Setting Up Telegram Bot
    • Getting Data from WeatherAPI.com

Pull-up/down Resistors

Estimated reading: 3 minutes 300 views

When connecting digital input devices such as push buttons to devices like Raspberry Pi and Arduino, you often see pull-up and pull-down resistors being connected.

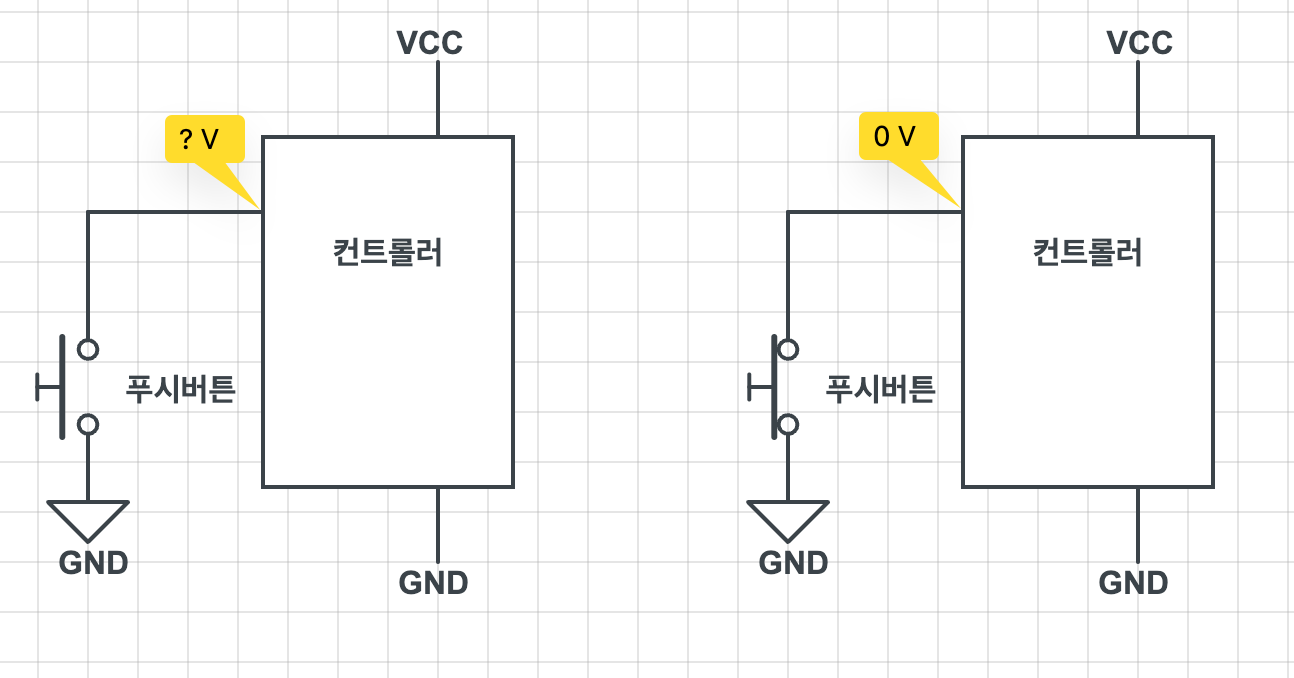
In digital circuits, when an input pin is connected to VCC (power supply), it is recognized as HIGH, and when connected to GND, it is recognized as LOW.

When a push button connected to a controller is pressed, the controller’s input pin voltage is connected to GND, making it 0V, or LOW. However, when the push button is not pressed, the input pin is not connected to either VCC (power supply) or GND, making it neither HIGH nor LOW. This is called a floating state, and it becomes an uncontrollable state as it can become HIGH or LOW due to noise, static electricity, etc.

​

Pull-up Resistor

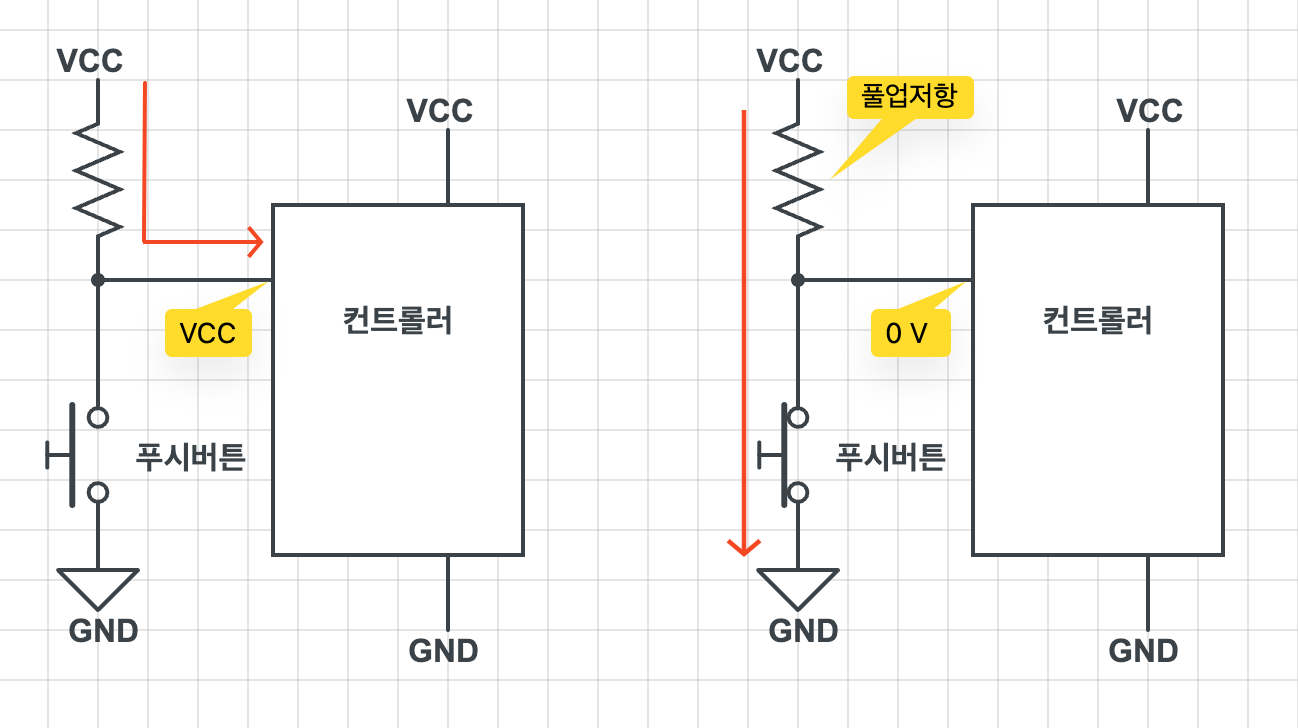
A resistor connected as shown below is called a pull-up resistor. When the push button is not pressed, current flows to the controller’s input pin, making it HIGH. When the push button is pressed, current flows to GND, making the controller input pin LOW.

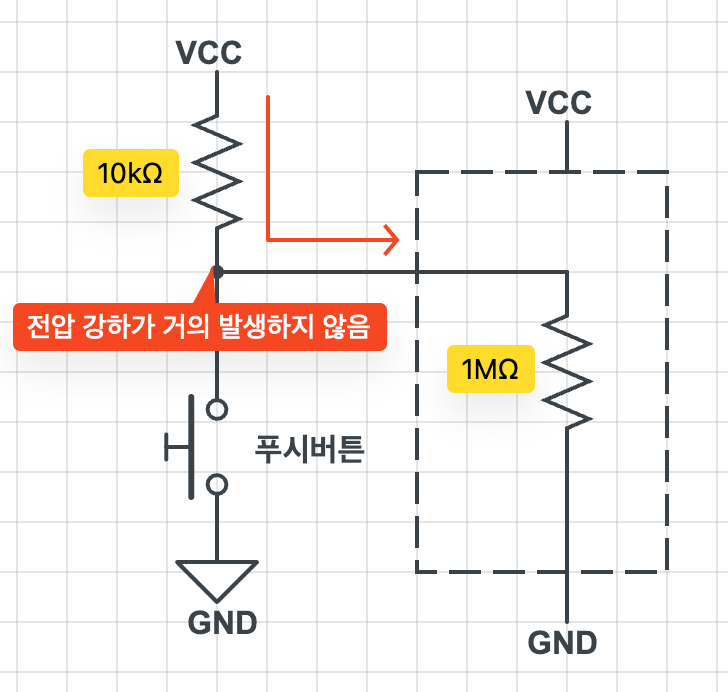
Since the impedance of the controller’s input pin (100k~1MOhm) is much larger than the pull-up resistor, virtually no voltage drop occurs at the bottom of the pull-up resistor when resistors are connected in series as shown in the figure below. (Series connection of resistors) Therefore, despite the presence of the pull-up resistor, a voltage close to the input voltage is applied to the input pin, making it recognized as HIGH.
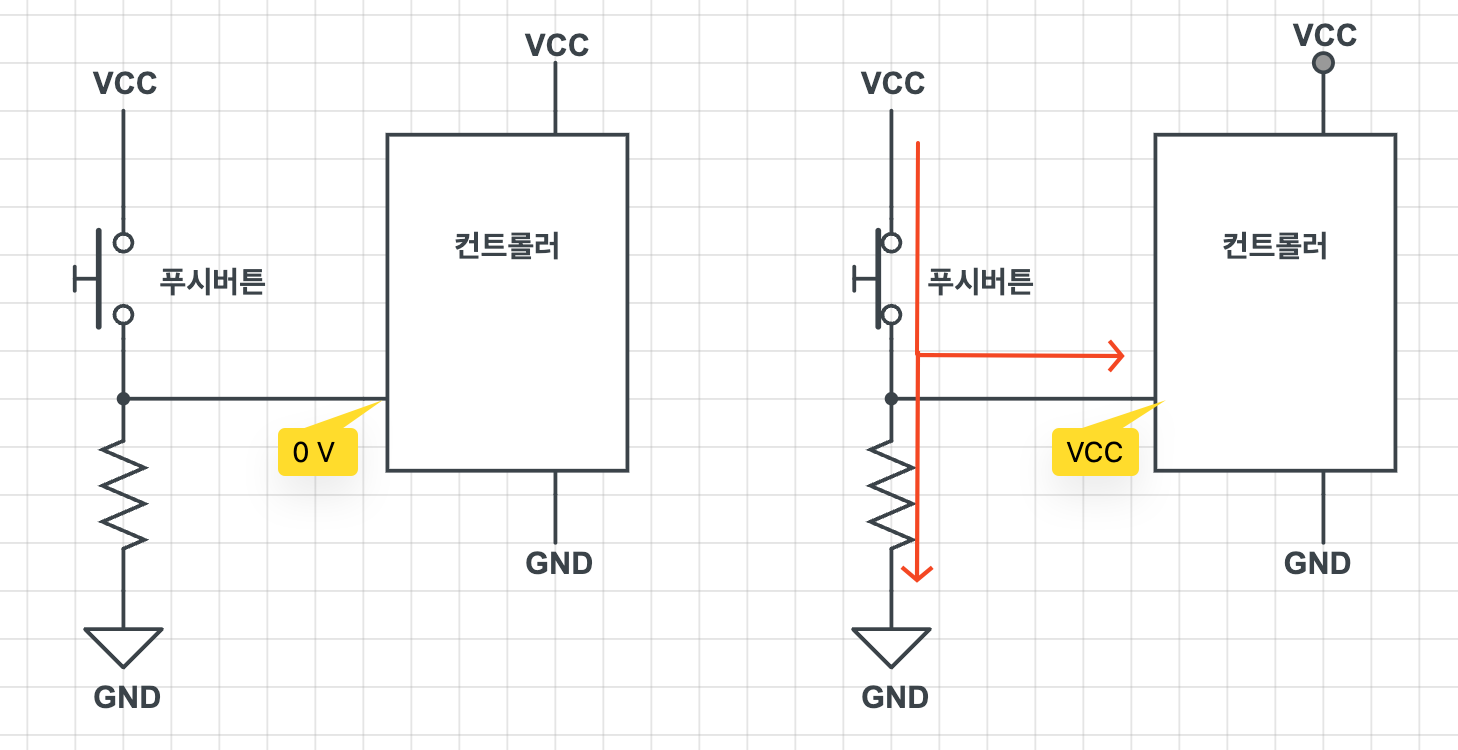
​

Pull-down Resistor

A resistor connected as shown below is called a pull-down resistor. When the push button is not pressed, the controller’s input pin is connected to GND, making it LOW. When the push button is pressed, current flows to the input pin, making it HIGH. In this case, the pull-down resistor serves to prevent excessive current flow to GND (short circuit).

​

Internal Pull-up/Pull-down Resistors

GPIO pins on devices like Raspberry Pi and BeagleBone have internal pull-up and pull-down resistors that can be activated through software. The resistance values of these resistors are suitable for most input devices such as push buttons, so there is no need to connect separate external resistors. Of course, external resistors can be added if needed.

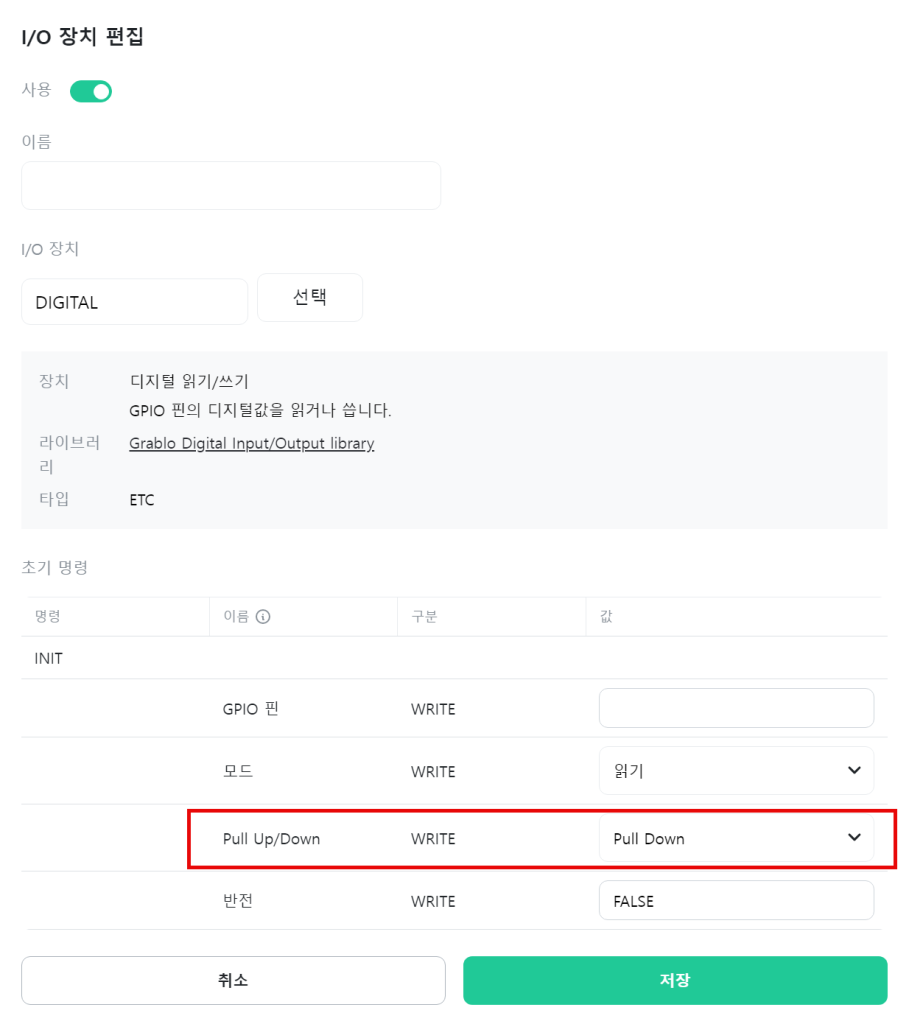
Pull-up/pull-down resistors can be configured in the INIT command for I/O devices – Digital Read/Write initialization.

The internal pull-up/pull-down resistor configuration feature is only available in Linux kernel version 5.10 or higher. This applies to Raspberry Pi OS, Ubuntu Linux 22 or higher, and Debian Linux 11 or higher.

​

​

​

​

찾으시는 내용이 없나요? 문의하기

문의하기

공유하기

Pull-up/down Resistors

Or copy link

Clipboard Icon
콘탠츠

ㅤ

Grablo Inc.
support@grablo.co

Site Links

  • Grablo Home
  • Grablo App

이 사이트의 모든 컨텐츠는 저작권법에 보호받는 저작물로서, 무단으로 복제, 배포하는 경우에는 저작권법에 의하여 처벌을 받을 수 있습니다. Copyright 2024 grablo.co. All Rights Reserved.