
GPIO
The GPIO of BeagleBone Black/Green consists of P8 and P9 Expansion Headers as shown below.
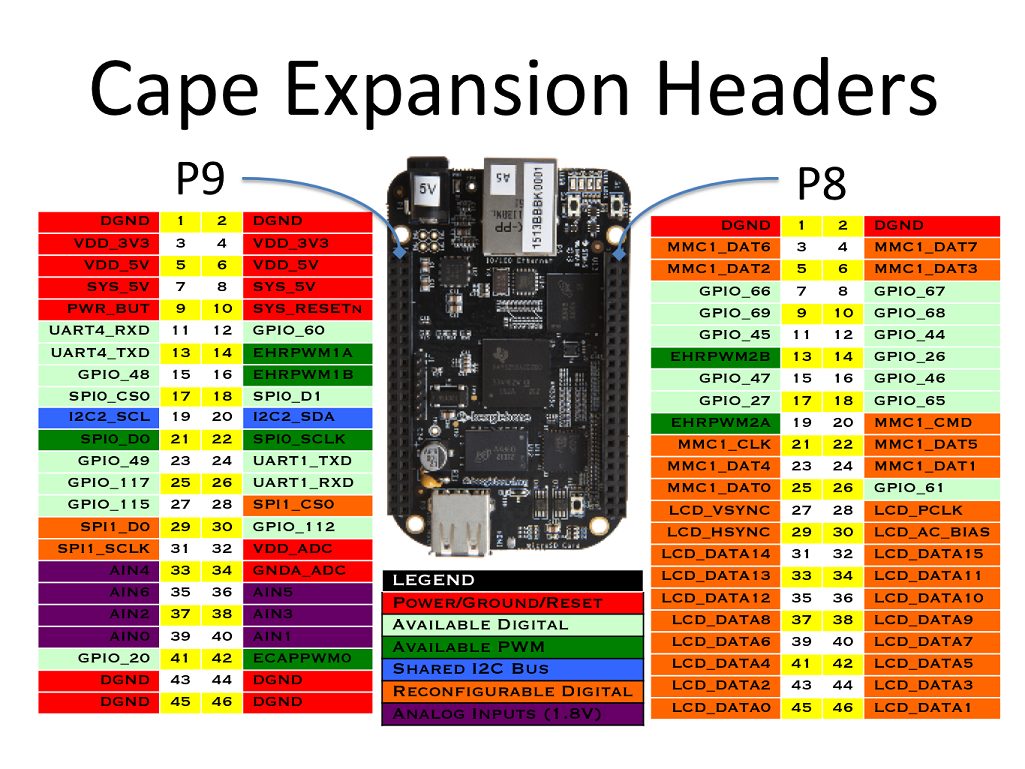
Power, GND
Power source and GND for supplying power to external devices. You can also supply power to the BeagleBone board through the VDD 5V pin.
- VDD 3.3V
- VDD 5V *
- SYS 5V
- DGND
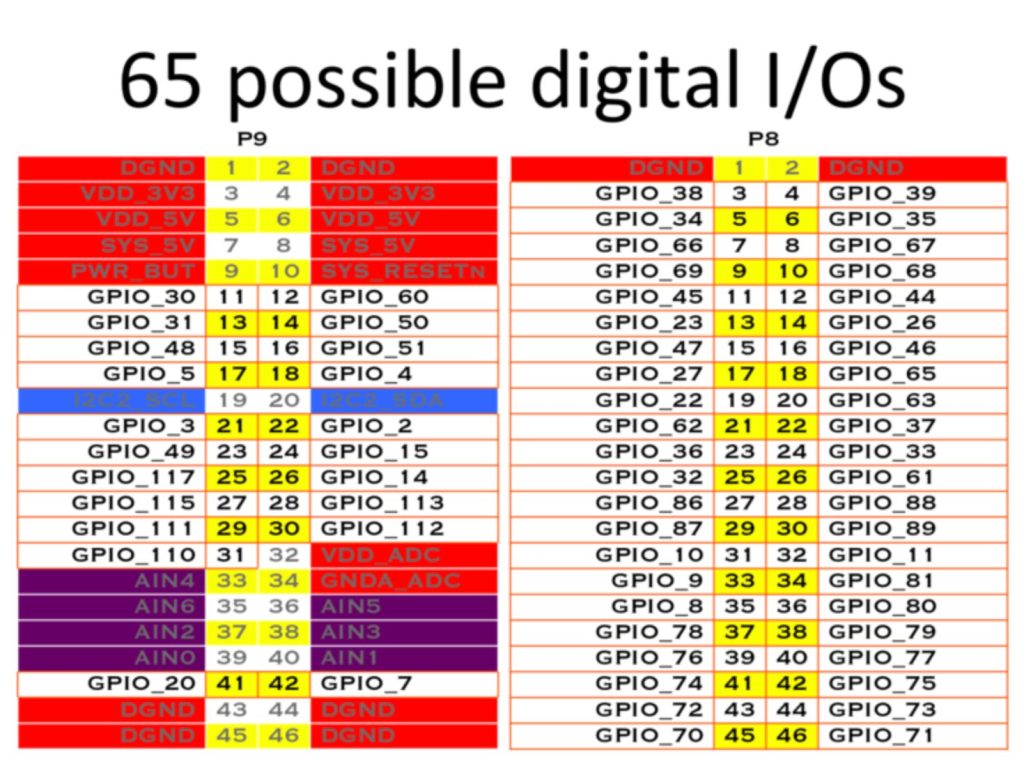
Digital I/O
Pins available for digital input or output. Some pins are dedicated for eMMC and HDMI use, so to use them as GPIO pins, you need to disable eMMC and HDMI functions. For detailed instructions, refer to here.
- GPIO_xxx
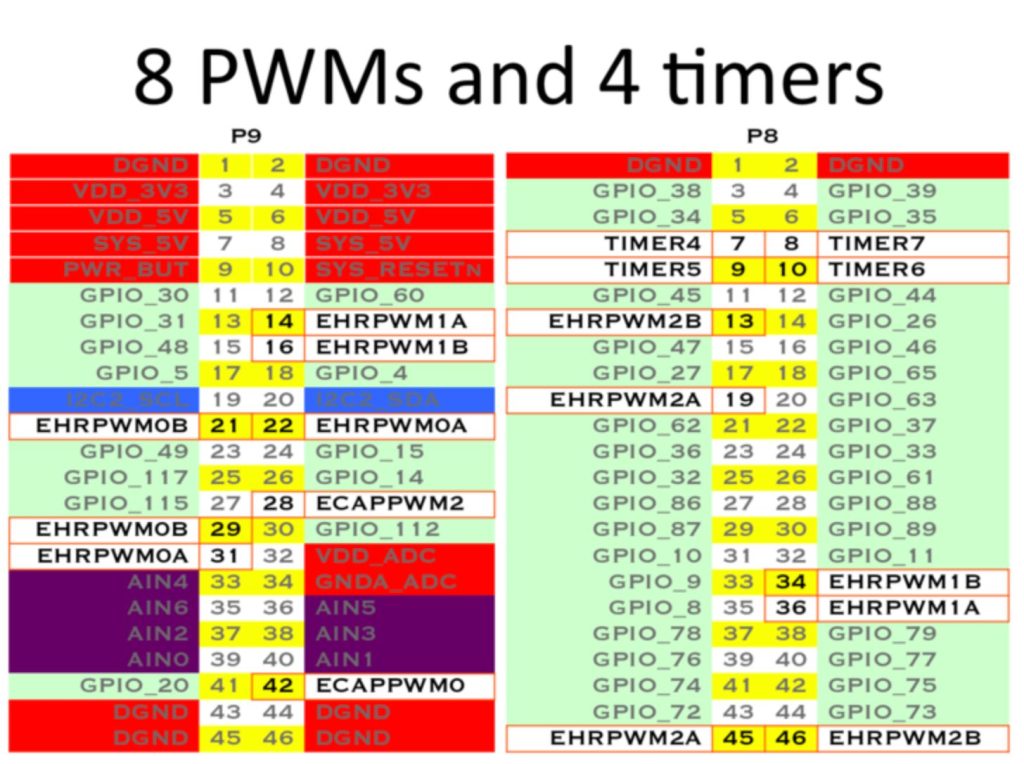
PWM
Pins for PWM output. Some pins are dedicated for eMMC and HDMI use, so to use them as PWM pins, you need to disable eMMC and HDMI functions. For detailed instructions, refer to here.
- EHRPWM0A
- EHRPWM0B
- EHRPWM1A
- EHRPWM1B
- EHRPWM2A
- EHRPWM2B
- ECAPPWM0
- ECAPPWM2
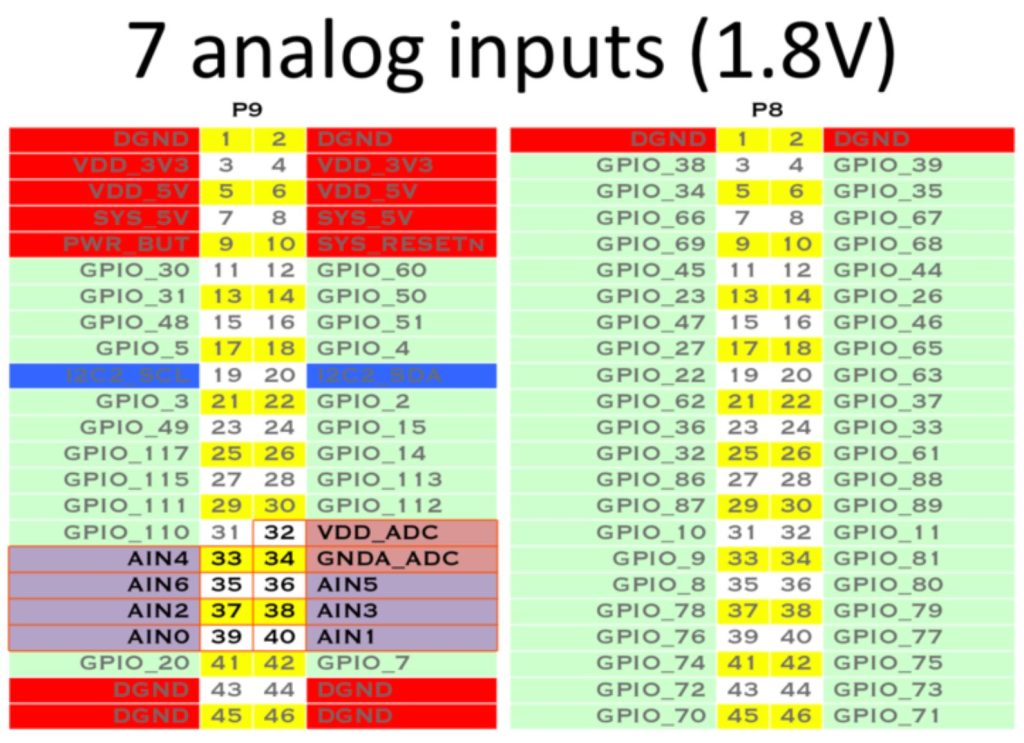
ADC
Analog to Digital Converter (ADC) pins. The voltage range is 0~1.8V.
- AIN0~AIN6
- VDD_ADC (1.8V)
- GNDA_ADC
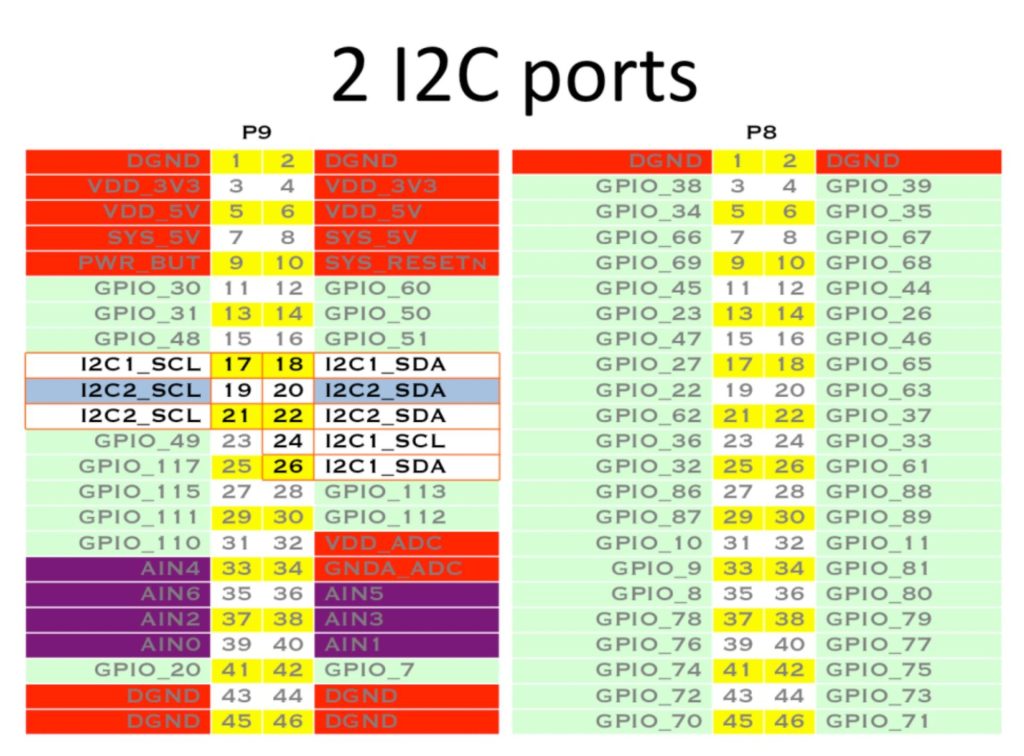
I2C
Pins for I2C communication. BeagleBone Black/Green provides 2 I2C ports.
- I2C1_SCL, I2C1_SDA
- I2C2_SCL, I2C2_SDA
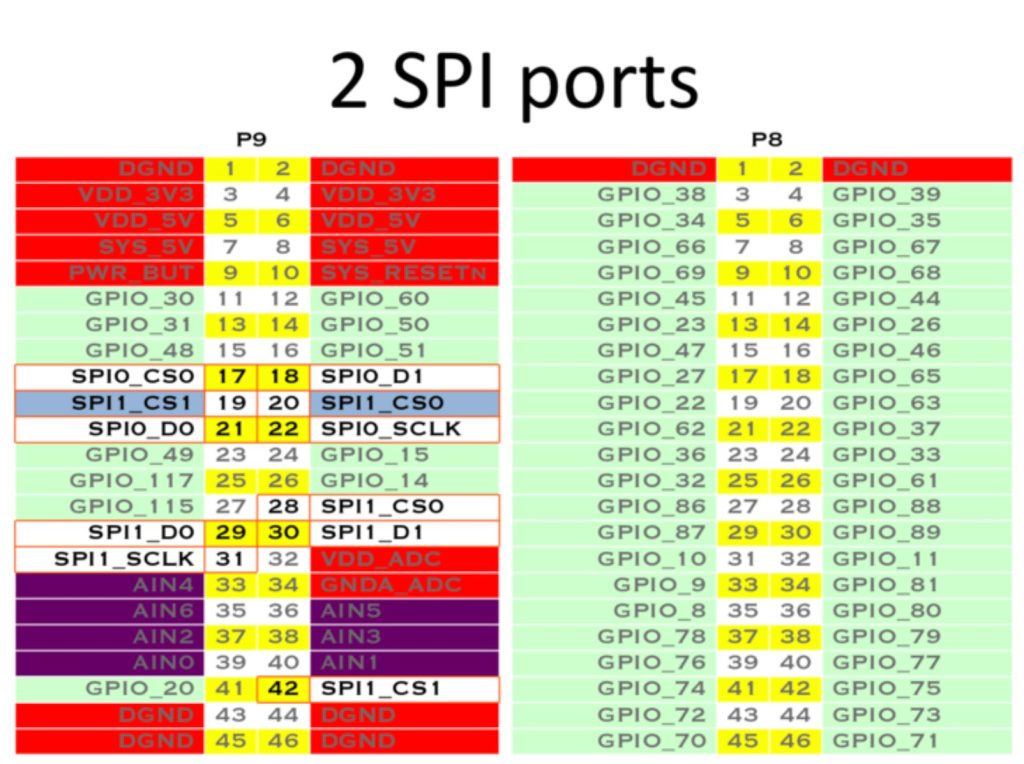
SPI
Pins for SPI communication. BeagleBone Black/Green provides 2 SPI ports. SPI1 pins are dedicated for HDMI use, so to use them as SPI pins, you need to disable HDMI function. For detailed instructions, refer to here.
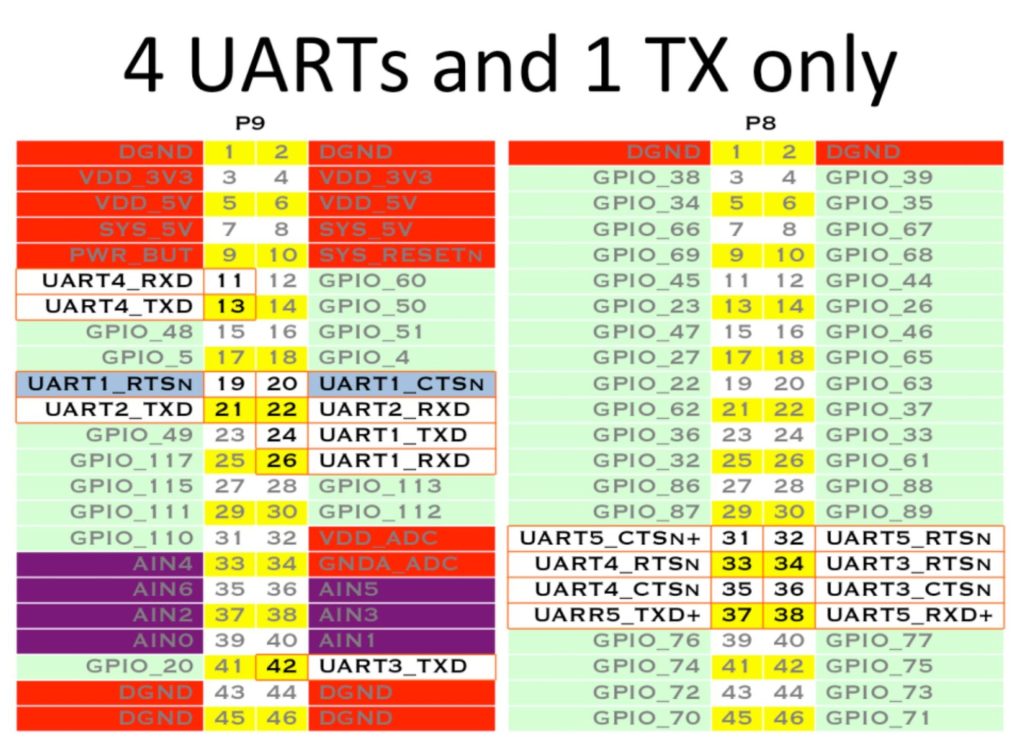
UART
Pins for UART communication. Some pins are dedicated for HDMI use, so to use them as UART pins, you need to disable HDMI function. For detailed instructions, refer to here.
- UART1_RXD, UART1_TXD
- UART2_RXD, UART2_TXD
- UART3_TXD
- UART5_RXD, UART5_TXD
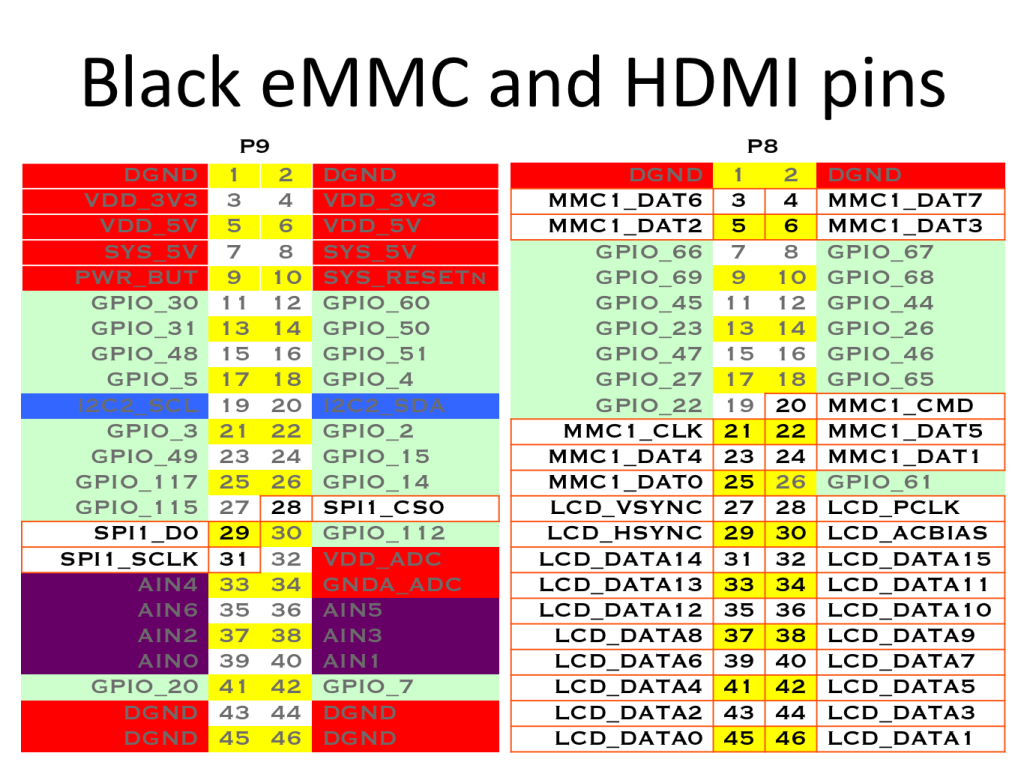
eMMC, HDMI
Pins for eMMC and HDMI control. If you don’t use eMMC or HDMI, you can disable these functions to use the pins for other purposes.
- MMC1_xxx
- LCD_xxx
- SPI1_xxx
Disabling eMMC and HDMI
Connect to the BeagleBone board via SSH.
Enter the following command:
sudo nano /boot/uEnv.txtThe file content will be displayed as follows:
##Disable auto loading of virtual capes (emmc/video/wireless/adc)
#Disable eMMC
disable_uboot_overlay_emmc=1 #Disable eMMC
#Disable HDMI
disable_uboot_overlay_video=1 #Disable HDMI
#Disable Audio
disable_uboot_overlay_audio=1 #Disable HDMI
#Disable Wireless
#disable_uboot_overlay_wireless=1
#Disable ADC
#disable_uboot_overlay_adc=1
To disable eMMC, uncomment #disable_uboot_overlay_emmc=1 by removing the # at the beginning.
To disable HDMI, uncomment #disable_uboot_overlay_video=1 and #disable_uboot_overlay_audio=1.
Press Ctrl + X to exit the editor.
Press Y to save the changes.
Enter the following command to reboot the BeagleBone and apply the changed settings:
sudo reboot